Tom's SP

You show me yours, and I'll show you mine...

Moderator: snoopyjon

Re: Tom's SP

Postby pptom » Sat Feb 27, 2016 8:12 pm

Finally received my 2 required tappet shims, so got these installed along with the rear brake pads.
I was about to give up for the day, but got thinking about the undertray. My SP1 tray has been cut to fit an aftermarket one - not nice, but I managed to pick up an SP2 tray with indicators and lights. Unfortunately it needs modifying to fit the SP1 subframe (something I didn't realise when buying). I decided this wasn't an option as I didn't want to wreck it. I got quoted £227 from a couple of Honda dealers for a replacement (one of them told me they couldn't do a discount as it was a painted part!), which I couldn't really stomach, so I went back to an idea I had before I got the SP2 tray.
It just so happens I have a few NC23 spares kicking about, including a complete undertray, The rear end of which wasn't such a bad match widthways, so I decided to create a frankenstein using my old one.

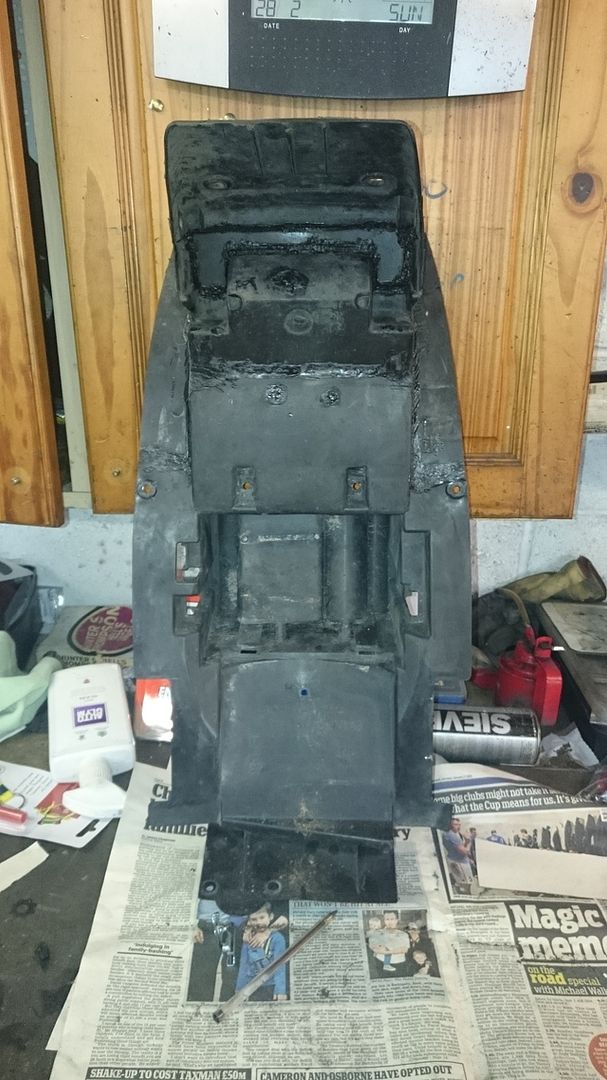
Here's the cut tray
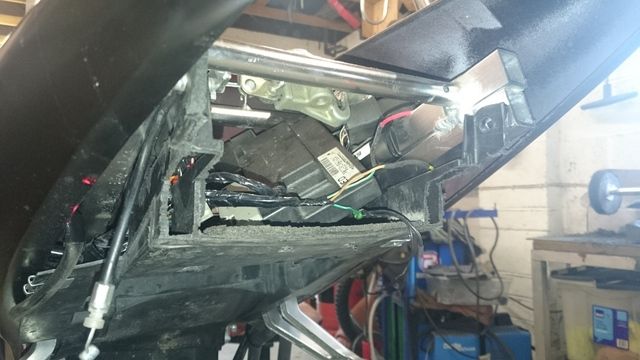
Image

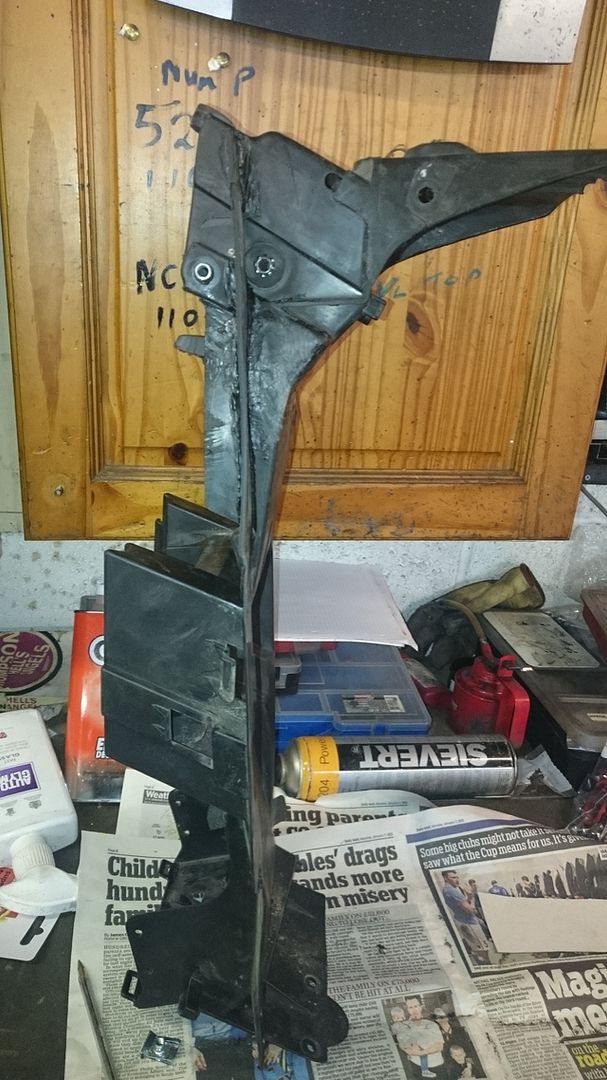
Heres the NC23 one after I hacked part of it off
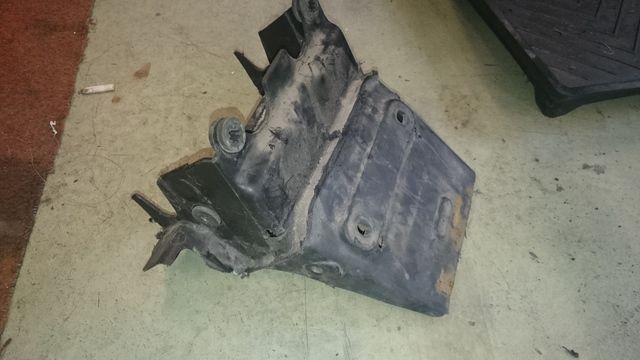
Image

And here it is after further cutting, fitting, cutting, fitting, cutting etc
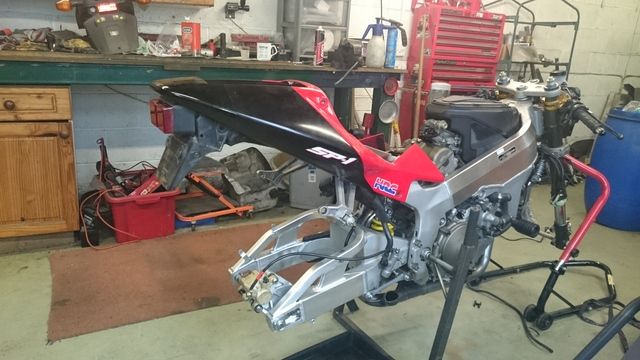
Image

Not a perfect match, but not bad and best of all its cost bugger all. I don't think many bar the purists would notice.
Its only tack plastic welded together at the minute, I need to finish the welding so its nice and strong and tidy it all up, make a more secure mount for the tail light and mount the indicators. Chuffed.

Just need a couple of bits of ally welding doing (lh rad and rhs footpeg) then I can move onto the front end - fork seals + head bearings arrived today.
Jobs will be to change the seals obviously, replace the fork springs, refill with 5Wt fork oil, paint the fork bottoms as they're showing a few chips, blast and black paint the 'gold' clipons, clean up the yokes, new headrace bearings etc
pptom
 
Posts: 37
Joined: Thu Jan 07, 2016 9:15 am

Re: Tom's SP

Postby pptom » Sun Feb 28, 2016 11:04 am

Spent about 3 hours plastic welding this morning in the freezing garage, this is the result:

Image

Image

Had to add the side 'wings' as these had previously been chopped off, it should keep the back end sealed from the elements now when on the bike, also filled up a couple of holes which had been drilled and added a plastic blanking plate behind the numberplate bracket as the NC23 tray was open to the elements here - a difficult area to work in so the welding isn't the best.
Just got to work on the visible welds to smooth them down a bit. Overall it seems very strong, before I made it I was thinking about additional bracing, but its not required since the plastic I added to the welds was from the old NC23 undertray, so it has all bonded together lovely.
pptom
 
Posts: 37
Joined: Thu Jan 07, 2016 9:15 am

Re: Tom's SP

Postby graham » Thu Mar 03, 2016 12:50 pm

Great work Tom! Love this thread
graham
 
Posts: 47
Joined: Mon Sep 28, 2015 8:39 am

Re: Tom's SP

Postby zxrob » Sat Mar 05, 2016 11:34 pm

:thumbup:

Looking good

Rob
zxrob
 
Posts: 91
Joined: Tue Jun 16, 2015 3:30 pm
Location: Midlands

Re: Tom's SP

Postby pptom » Sun Mar 06, 2016 9:23 am

Thanks.
Decided to make a start on the front end yesterday, not many pics I'm afraid.
Stripped the forks down and decided I need new lower bushes which I stupidly didn't order, so thats now on hold.
Had a look at the head bearings which I was going to replace with tapered ones - turns out they're already tapered and I'm pretty sure they were too loose, so I greased them back up and reinstalled to what I think is the correct tension. (so now have a new set of tapered head bearings on the shelf!, might ebay them)
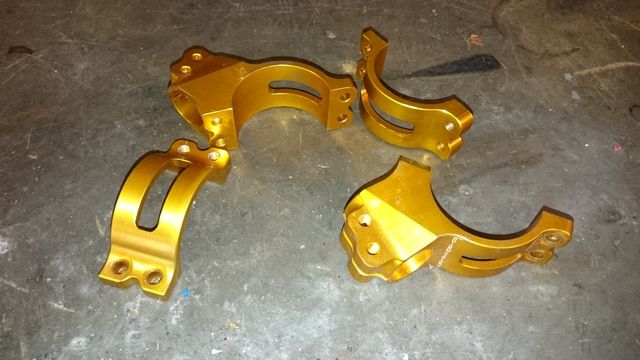
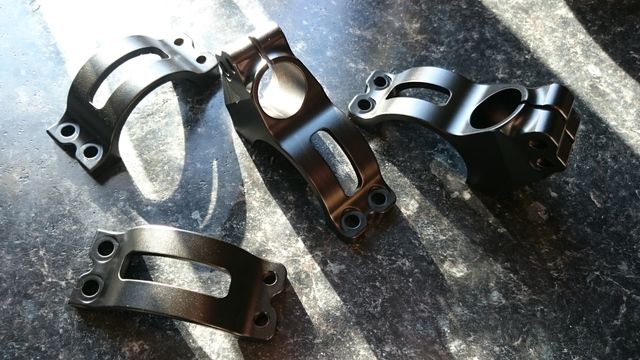
Clip-ons stripped, blasted and painted, just drying hanging above the rad in my lounge, gold anodised before (pic below), now they're satin black.

Image

Image

Also done the mirror mounts the same colour.
Rear light plugs ordered from the states yesterday - as I've shown, my light wiring was butchered to fit the aftermarket undertray, hopefully I'll be able to tie these in to the existing loom.
Also getting the last few bits of plating back today, mostly wheel stuff inc front disc bolts, rear wheel spacers and sprocket nuts / washers. The wheels have been cleaned, chips painted and waxed, if I'm totally honest they could do with being stripped and powdercoated as the Honda paint is so thin, thats probably a job for next winter though and they'll look fine on the bike.
I also hung the silencers yesterday, I clearly need new gaskets on the link pipes - they had been bodged before with pieces of ally tube and the link pipes don't fit properly, meaning the silencers sit unevenly - more expense
pptom
 
Posts: 37
Joined: Thu Jan 07, 2016 9:15 am

Re: Tom's SP

Postby pptom » Sat Mar 12, 2016 12:47 pm

This week I've been doing the forks.
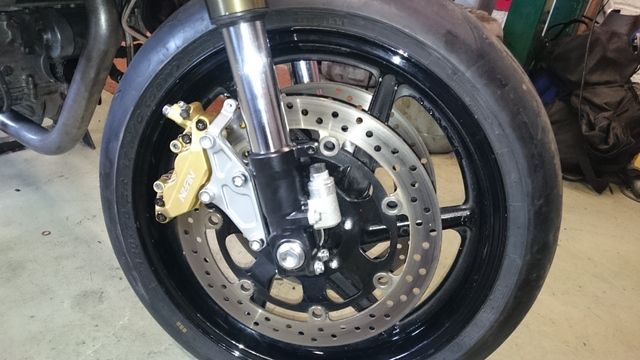
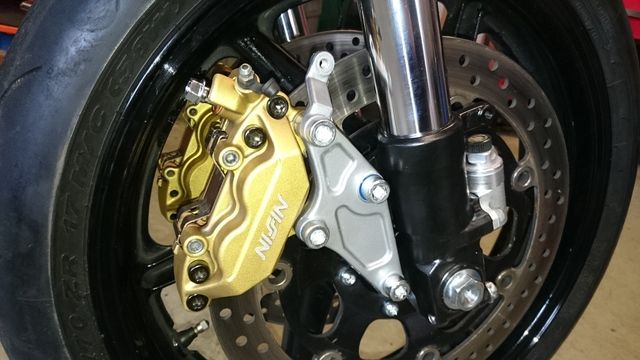
KTech springs, new Honda oil and dust seals, 5wt fork oil as per KTech with 115mm air gap, replaced the mangled adjuster screw with another damper rod assy.
Also painted the bottoms satin Black, the reason I didn't go with the original silver / grey was partly financial - would have had to buy the paint and 2k laquer, I like the black, plus it will be far easier to touch in if they get chipped again.
Just finished re-fitting with plated bolts etc (had the caliper bolts plated in black zinc as it looks better on the gold bodies I think):

Image

Image

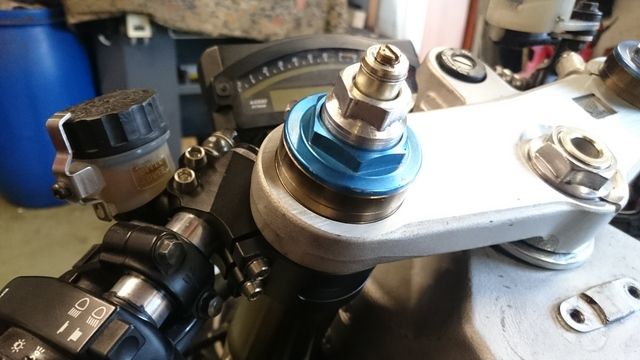
New / replacement top cap and top adjuster, also re-fitted the black clipons, look so much better

Image

There's a few marks on the fork outer tubes, from previous brake cable rubbing, but I'll have to live with these, think they're about £270 each from Honda. The replacement fork leg that I stripped the damper assy from had a decent enough looking outer, but on looking up the inside bore, there appeared to be a couple of little creases, so possibly a little bent or overtightened in the yokes.
pptom
 
Posts: 37
Joined: Thu Jan 07, 2016 9:15 am

Re: Tom's SP

Postby Neil McClure » Sat Mar 12, 2016 8:14 pm

Hi your doing some great work on your SP, but IMO don,t anodise things in a colour other than black if necessary. Looking forwatd to it being finished.
Im just a happy chappy!
Neil McClure
 
Posts: 217
Joined: Tue Mar 26, 2013 10:19 pm
Location: Argyll Scotland

Re: Tom's SP

Postby Dazzle » Sun Mar 20, 2016 9:13 pm

Hi Tom,
You are doing an awesome job on the SP1, just waiting for the next update now as I am doing something similar on my own SP1. :)
Just wondered if you are planning or have refurbed the top yoke and swinging arm to the standard brushed alu finish? If so how are you going to do it? Need to take mine on soon and it would be great to get some advise!
Cheers
Dazzle
 
Posts: 3
Joined: Tue Jul 28, 2015 11:51 am

Re: Tom's SP

Postby pptom » Mon Mar 21, 2016 1:52 pm

The top yoke came up very well once I'd removed the carbon cover and gave it a good clean. Think I've seen a thread on here about restoring a bad one which involves painting the outside and bottom, then running the top face over some wet and dry to get the brushed effect before clearcoating.
Try this
http://nsr250.net/forums/viewtopic.php? ... &&start=15

Swingarm is OK too after cleaning, but I think it's a big job to take it back to 100% original finish. Tried some metal Polish on a couple of scratches and it didn't touch it. I believe they're factory anodised.
For cleaning I used jizer to get the worst off, then gt85 for a final clean.
pptom
 
Posts: 37
Joined: Thu Jan 07, 2016 9:15 am

Re: Tom's SP

Postby pptom » Thu Mar 24, 2016 7:04 am

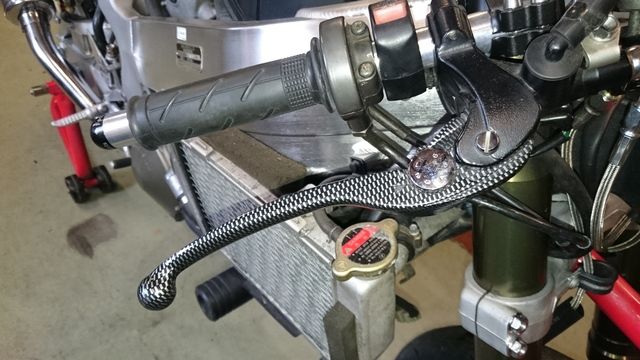
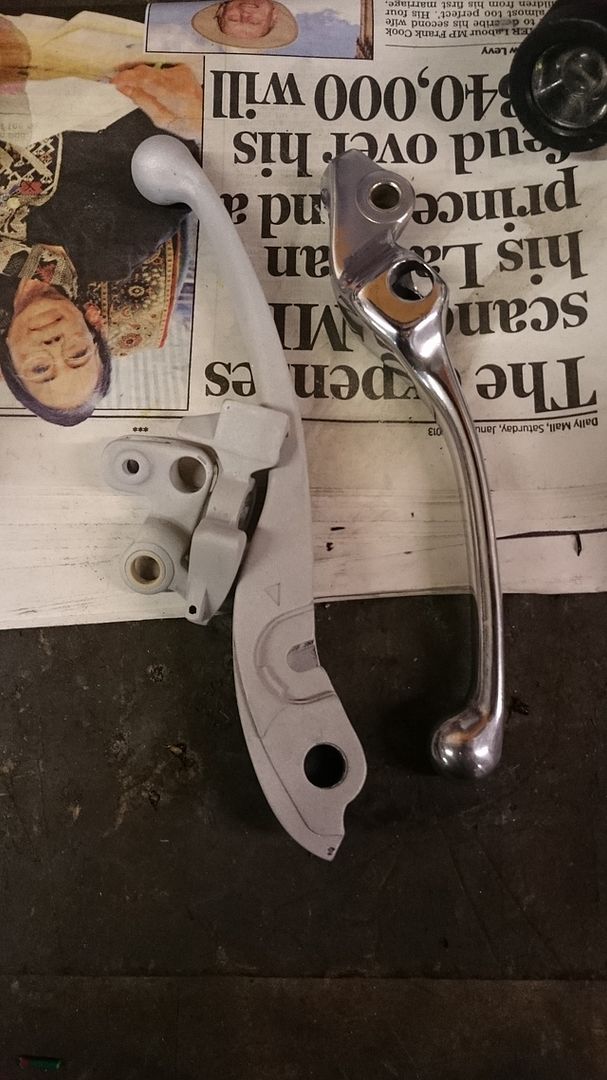
With the calipers and clutch re-fitted and bled it was time to tackle the levers

Image

I thought it may have been some kind of plastic wrap, but no joy. Its more like a plasticised paint, so off they went into the blast cabinet, followed by a poloishing session. Post blast and one after polishing.

Image

Turned out pretty well, they look oem again.

Replaced the 15 tooth 520 front sprocket as it was a little worn and loose on the shaft, the chain is now back on and will be rivited today.
Frustratingly still waiting on some airbox rubbers from germany (5 weeks and counting) once they're here i can put the rest of the bike back together.
Its already mot'd, so should be good to ride straight away.
pptom
 
Posts: 37
Joined: Thu Jan 07, 2016 9:15 am

PreviousNext

Return to Readers Bikes

Who is online

Users browsing this forum: No registered users and 1 guest